 Empowering you with knowledge Empowering you with knowledge
A favicon is a small image that appears in the browser tab next to your website’s title. It helps users quickly identify your website among other tabs they may have open. In this tutorial, we’ll show you how to add a favicon to your WordPress blog.
Step 1: Create your favicon image The first step is to create a favicon image. The recommended size is 512×512 pixels. You can use any image editing software such as Adobe Photoshop or Canva to create your favicon.
Step 2: Save the image in the correct format After creating your favicon image, you need to save it in the correct format, which is .ico. If your image editing software doesn’t support this format, you can use a free online converter like Convertio to convert it.
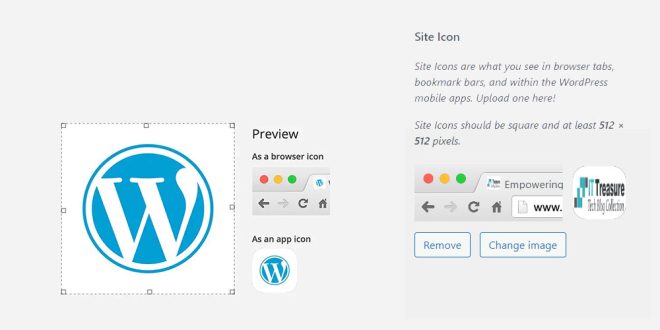
Step 3: Upload the favicon to your WordPress blog Once you have your favicon in the .ico format, you can upload it to your WordPress blog. To do this, log in to your WordPress dashboard and navigate to Appearance » Customize » Site Identity. Here, you’ll see an option to upload your favicon.
Step 4: Preview and publish your changes After uploading your favicon, you can preview your changes by opening your website in a browser tab. If everything looks good, click the Publish button to make the changes live on your website.
That’s it! Adding a favicon to your WordPress blog is a quick and easy way to make your website more recognizable and professional.